eSIMs are straightforward to install and use on any device you take on your travels. However, there will always come a time when you need to remove your digital card — and doing so is thankfully just as simple, provided you follow the steps specific to your device.
Here's what you need to know about deleting eSIMs from your phone or tablet, why you might need to, and how to do it correctly on both Apple and Android devices.
Why should you delete an eSIM?
There are several good reasons to remove an eSIM once you've used up your data or come to the end of your trip.
Free up space on your device. Data storage can be limited, and keeping used or inactive eSIMs installed takes up space for no benefit. Remove them as soon as you no longer need them.
Selling or resetting your device. If you're selling your phone or giving it away, a full factory reset is always recommended — and that includes removing any eSIMs. A used eSIM left on a sold device gives someone else access to your data profile.
Moving to a new destination. If you're travelling from Germany to Greece, for example, you'll want to install a fresh eSIM for your new location. Removing the old one first keeps things tidy and makes it easier to track what you're covered for.
You've used your data allowance. Once the data is gone, there's no reason to keep the eSIM installed. Remove the old one and install a new one when you're ready to top up.
Freeing up eSIM slots. Some devices have a limited number of eSIM slots. If you're running low, removing inactive eSIMs is the simplest solution.
Reducing your security exposure. eSIMs don't pose a direct security threat — but if your device is ever compromised, a redundant eSIM is additional sensitive data an attacker could access. Remove anything you're no longer using.
[tip title="If in doubt, wait until you're completely finished with the data before deleting"]Once an eSIM is deleted, it cannot be restored or reinstalled. If you're mid-trip and think you might still need the data — or if you're unsure whether your allowance has fully expired — wait until you're certain before proceeding.[/tip]How to delete an eSIM on an iPhone or iPad
Apple devices make eSIM management quick and straightforward from the Settings menu. Follow these steps to remove an eSIM from your iPhone or iPad.
[warning]Deleting an eSIM on an Apple device is irreversible — the eSIM cannot be restored once removed. Make absolutely sure you no longer need the eSIM before you proceed. If you have multiple carriers installed, double-check you are selecting the correct one before confirming deletion.[/warning]On iPhone:
- Confirm you are finished with the eSIM and will not need it again.
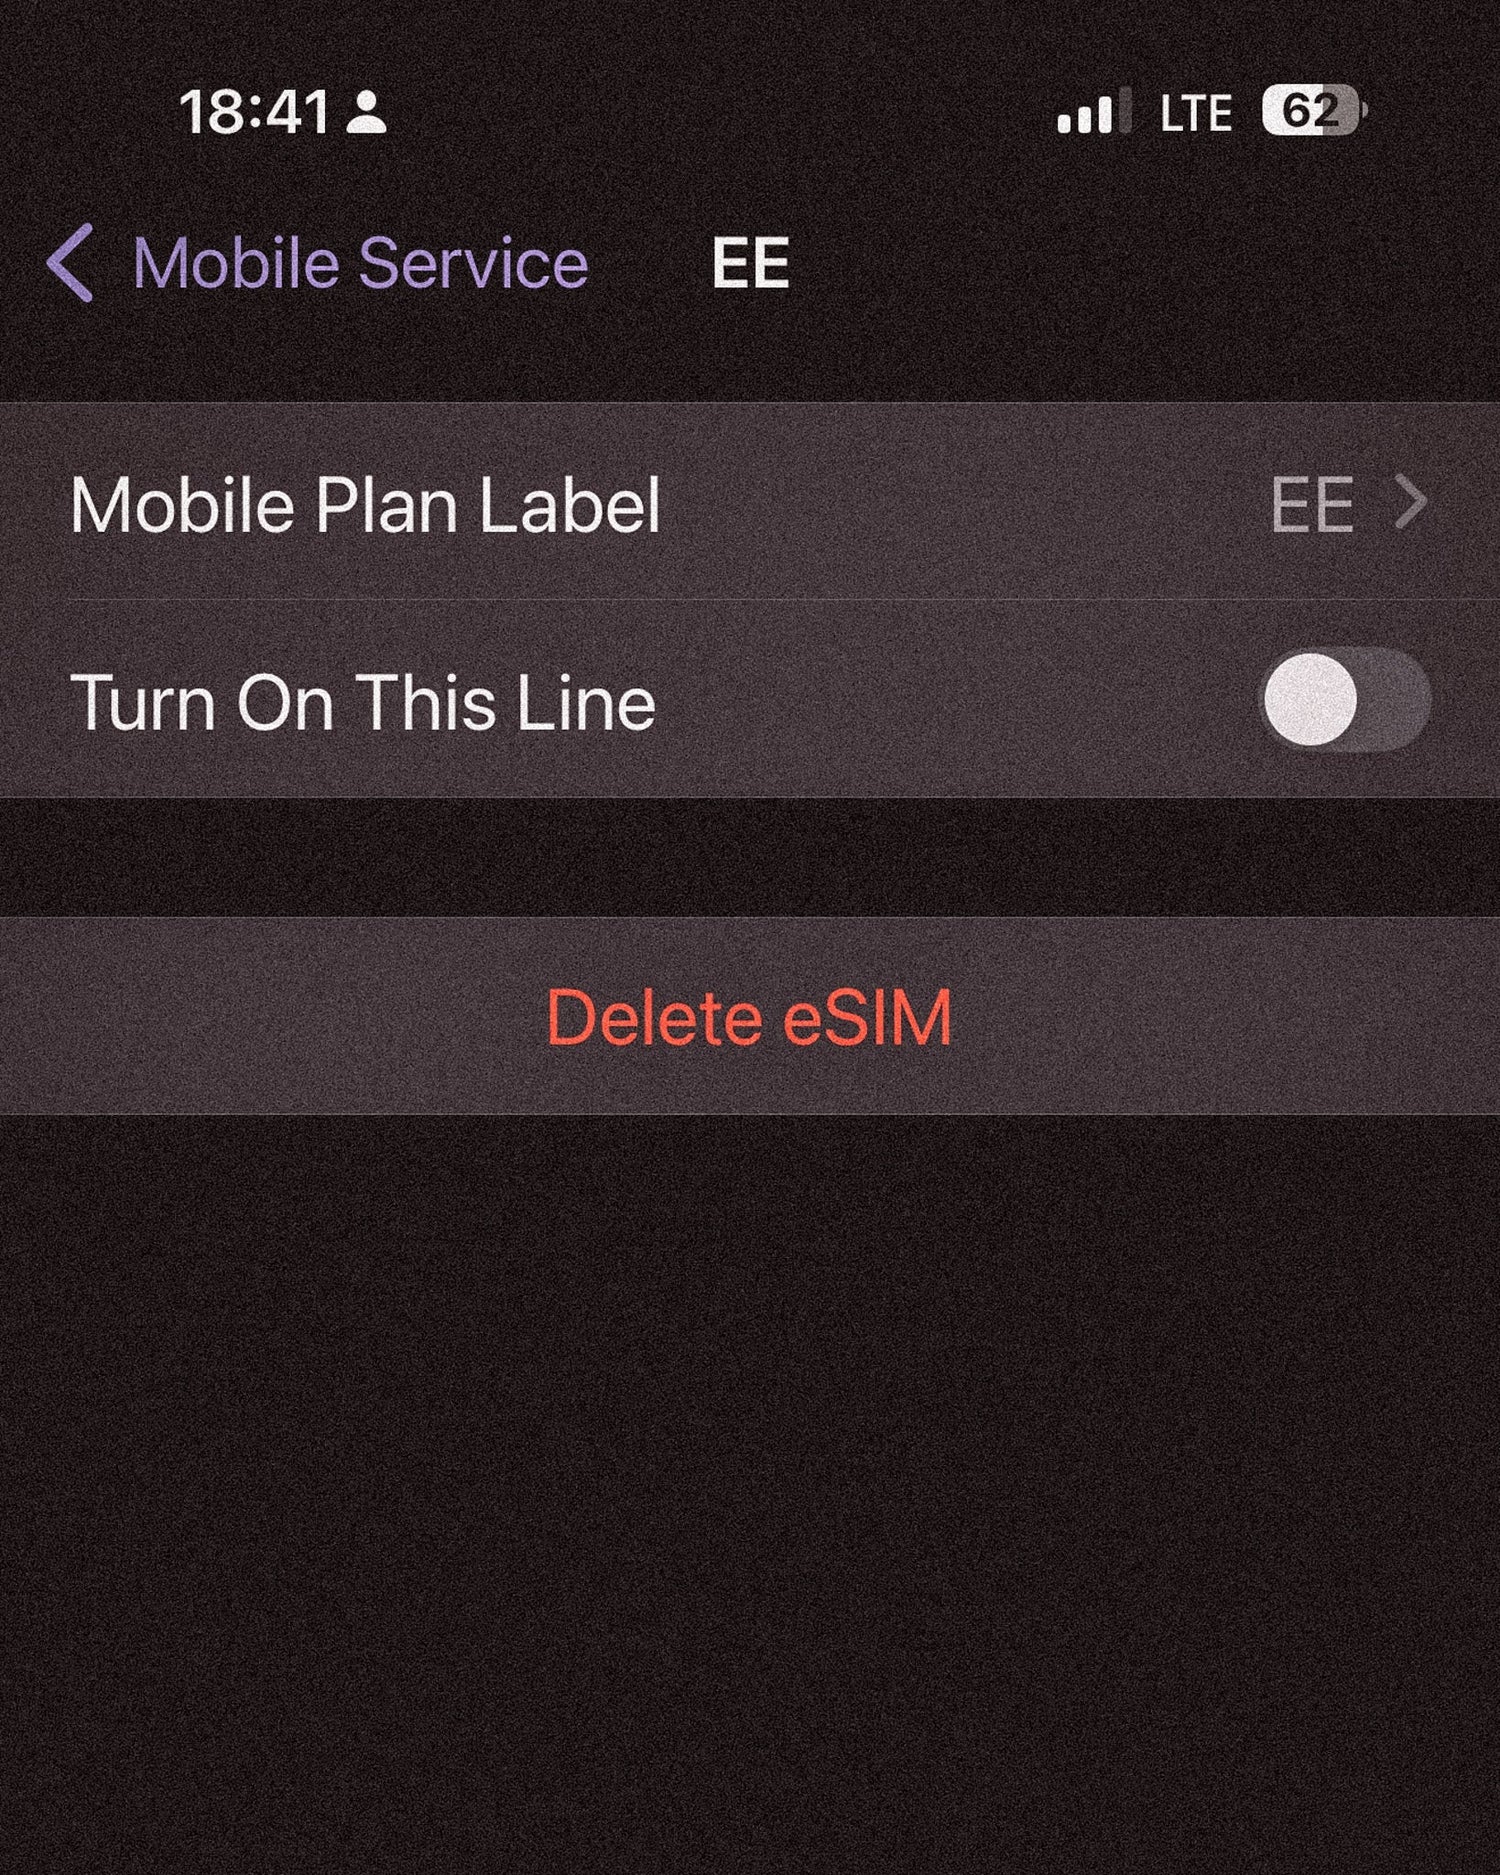
- Go to Settings and tap Cellular (or Mobile Service, depending on your region).
- Select the eSIM you want to remove from the list of installed plans.
- Tap Delete eSIM (or Remove eSIM) and confirm when prompted.
On iPad:
- Go to Settings and tap Mobile Data.
- Select the eSIM you wish to remove.
- Tap Delete eSIM and confirm.
How to delete an eSIM on an Android device
The process for deleting an eSIM from an Android device varies depending on the manufacturer and software version. The steps below cover the general process — if you get stuck, always refer to your device manufacturer's support documentation.
[warning]As with Apple devices, deleting an eSIM on Android is irreversible. Always confirm you are finished with the eSIM before removing it, and make sure you are selecting the correct plan if you have multiple eSIMs installed.[/warning]- Confirm you are finished with the eSIM and do not need to use it again.
- Go to Settings and navigate to Connections (this may be labelled differently depending on your device).
- Tap SIM Card Manager (or similar — wording varies by manufacturer).
- Select the eSIM you want to remove, turn it off if it is active, then tap Remove to complete the deletion.
- In some cases, restarting your device afterwards helps it recognise that the eSIM has been fully removed.
Installing your next SIMOVO eSIM
We recommend only purchasing and installing a new SIMOVO eSIM once you have confirmed your old one has been successfully removed. That way, it's easy to keep track of what you're covered for and where your eSIM is active.
Once you've used up your data or your trip has finished, delete your SIMOVO eSIM and pick up a new one from our store. We make it straightforward to add new data coverage whenever you're ready.
[tip title="Need help with your SIMOVO eSIM? We're always on hand"]If you run into any difficulties at any point — whether that's installing, managing, or deleting your eSIM — get in touch with the SIMOVO team and we'll troubleshoot with you. Don't sit with a technical issue that's affecting your connection when you're on the road.[/tip] [faq] [q]Can I reinstall a deleted eSIM?[/q] [a]No — once an eSIM has been deleted from a device, it cannot be reinstalled or restored. This applies to both Apple and Android devices. If you think you might still need your eSIM data, do not delete it until you are certain the trip or data allowance is finished. If you need more data after deletion, you will need to purchase a new eSIM.[/a] [q]Why should I delete an eSIM?[/q] [a]The main reasons to delete an eSIM are: you have used up your data allowance and no longer need it; your trip has ended and you are moving to a new destination; you are selling, giving away, or factory resetting your device; you need to free up eSIM slots on your phone; or you want to reduce the amount of sensitive data stored on your device. Unused eSIMs take up space and carry a small security risk if your device is ever compromised.[/a] [q]How do I delete an eSIM on an iPhone?[/q] [a]On iPhone, go to Settings, then tap Cellular or Mobile Service. Select the eSIM you want to remove from the list of installed plans, then tap Delete eSIM or Remove eSIM and confirm when prompted. The process is irreversible — make sure you are selecting the correct plan if you have multiple eSIMs installed. On iPad, the same process applies via Settings, then Mobile Data.[/a] [q]How do I delete an eSIM on Android?[/q] [a]On most Android devices, go to Settings, then Connections, then SIM Card Manager (or similar wording depending on your manufacturer). Select the eSIM you want to remove, turn it off if active, then tap Remove to delete it. The exact steps vary by manufacturer and software version — if the steps above don't match your device, check your manufacturer's support documentation.[/a] [q]Does a factory reset delete my eSIM?[/q] [a]Yes — performing a full factory reset or erase on both Apple and Android devices will delete all eSIMs stored on the device as part of the reset process. If you are resetting your device before selling or giving it away, you do not need to delete your eSIMs separately first. The full reset will handle this automatically.[/a] [q]How do I get a new SIMOVO eSIM after deleting my old one?[/q] [a]Once your old eSIM has been successfully removed, you can purchase a new SIMOVO eSIM directly from our store. Choose the destination and data plan you need, complete the purchase, and follow the installation instructions — the process takes just a few minutes. If you have any questions or run into difficulties, the SIMOVO support team is always on hand to help.[/a] [/faq]